Hear The Wind with Upcycling
Spring is in the air. At Freshkills Park that usually means the beginning of spring field trips and tours, but because we are social distancing, we’re bringing some of our favorite projects to you at home. Earlier this week Ariel from The Little Mermaid inspired us to decorate with things she scavenged. Today, we will show you how to upcycle a tin can into a wind chime. Although tin cans are recyclable, it is always better to reuse than recycle.
About half of Freshkills Park is a grassland ecosystem, and visitors often comment on how windy the grasslands are; without trees, wind can travel a long way. Wind serves ecological benefits in many habitats. In the spring, wind helps disperse seeds of native grasses, like switchgrass and little bluestem, supporting the growing ecosystem.
Celebrate spring winds by building a wind chime out of recycled materials. Wind chimes are an extremely flexible project. There is a list of suggested materials below, but feel free to be creative with this list. Think about what you have in yours! Start by taking a “scavenger hunt” around the house to look for interesting objects that will make noise. Small glass or metal objects work best.
UpStream at Home
Suggested materials:
Yarn or string
Tin can
Hammer
Nail
Materials to decorate the can
Firm plastic container
Scissors
Glue
1 paper clip
Wind chime materials: Anything small and metal or glass. Try buttons, bottle caps, beads, cutlery, nails or screws, or washers.
What You’ll Do:
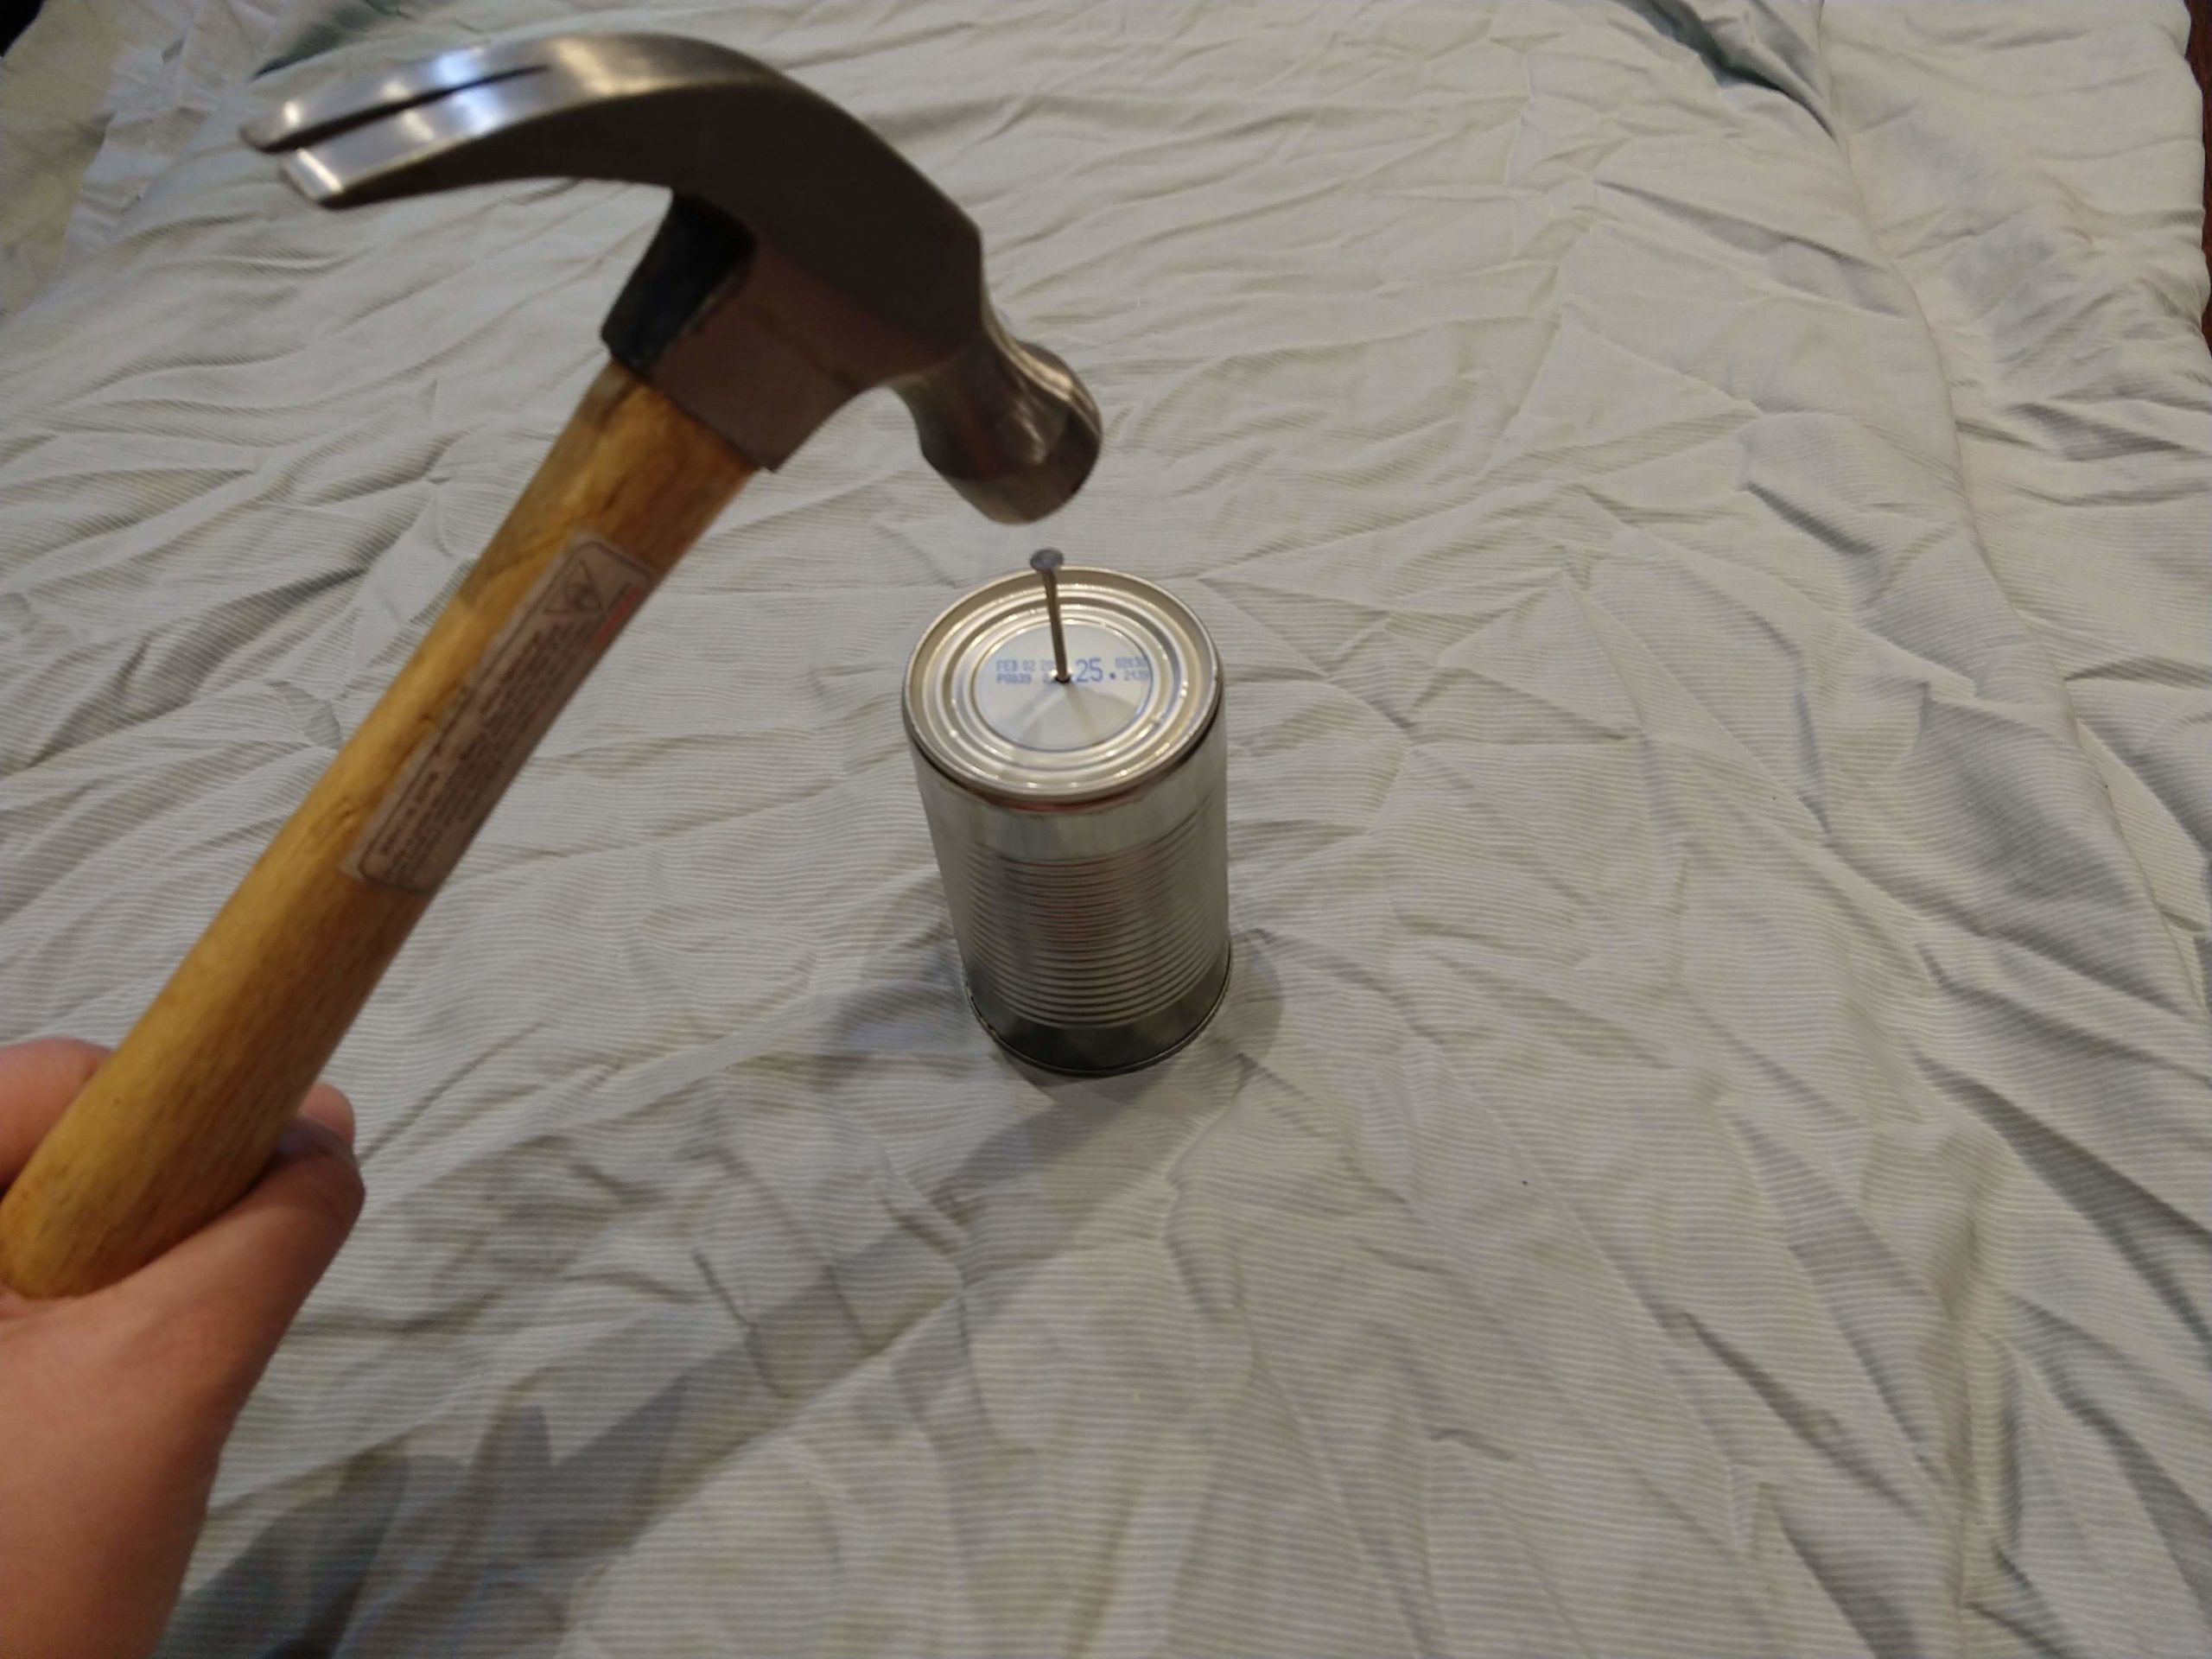
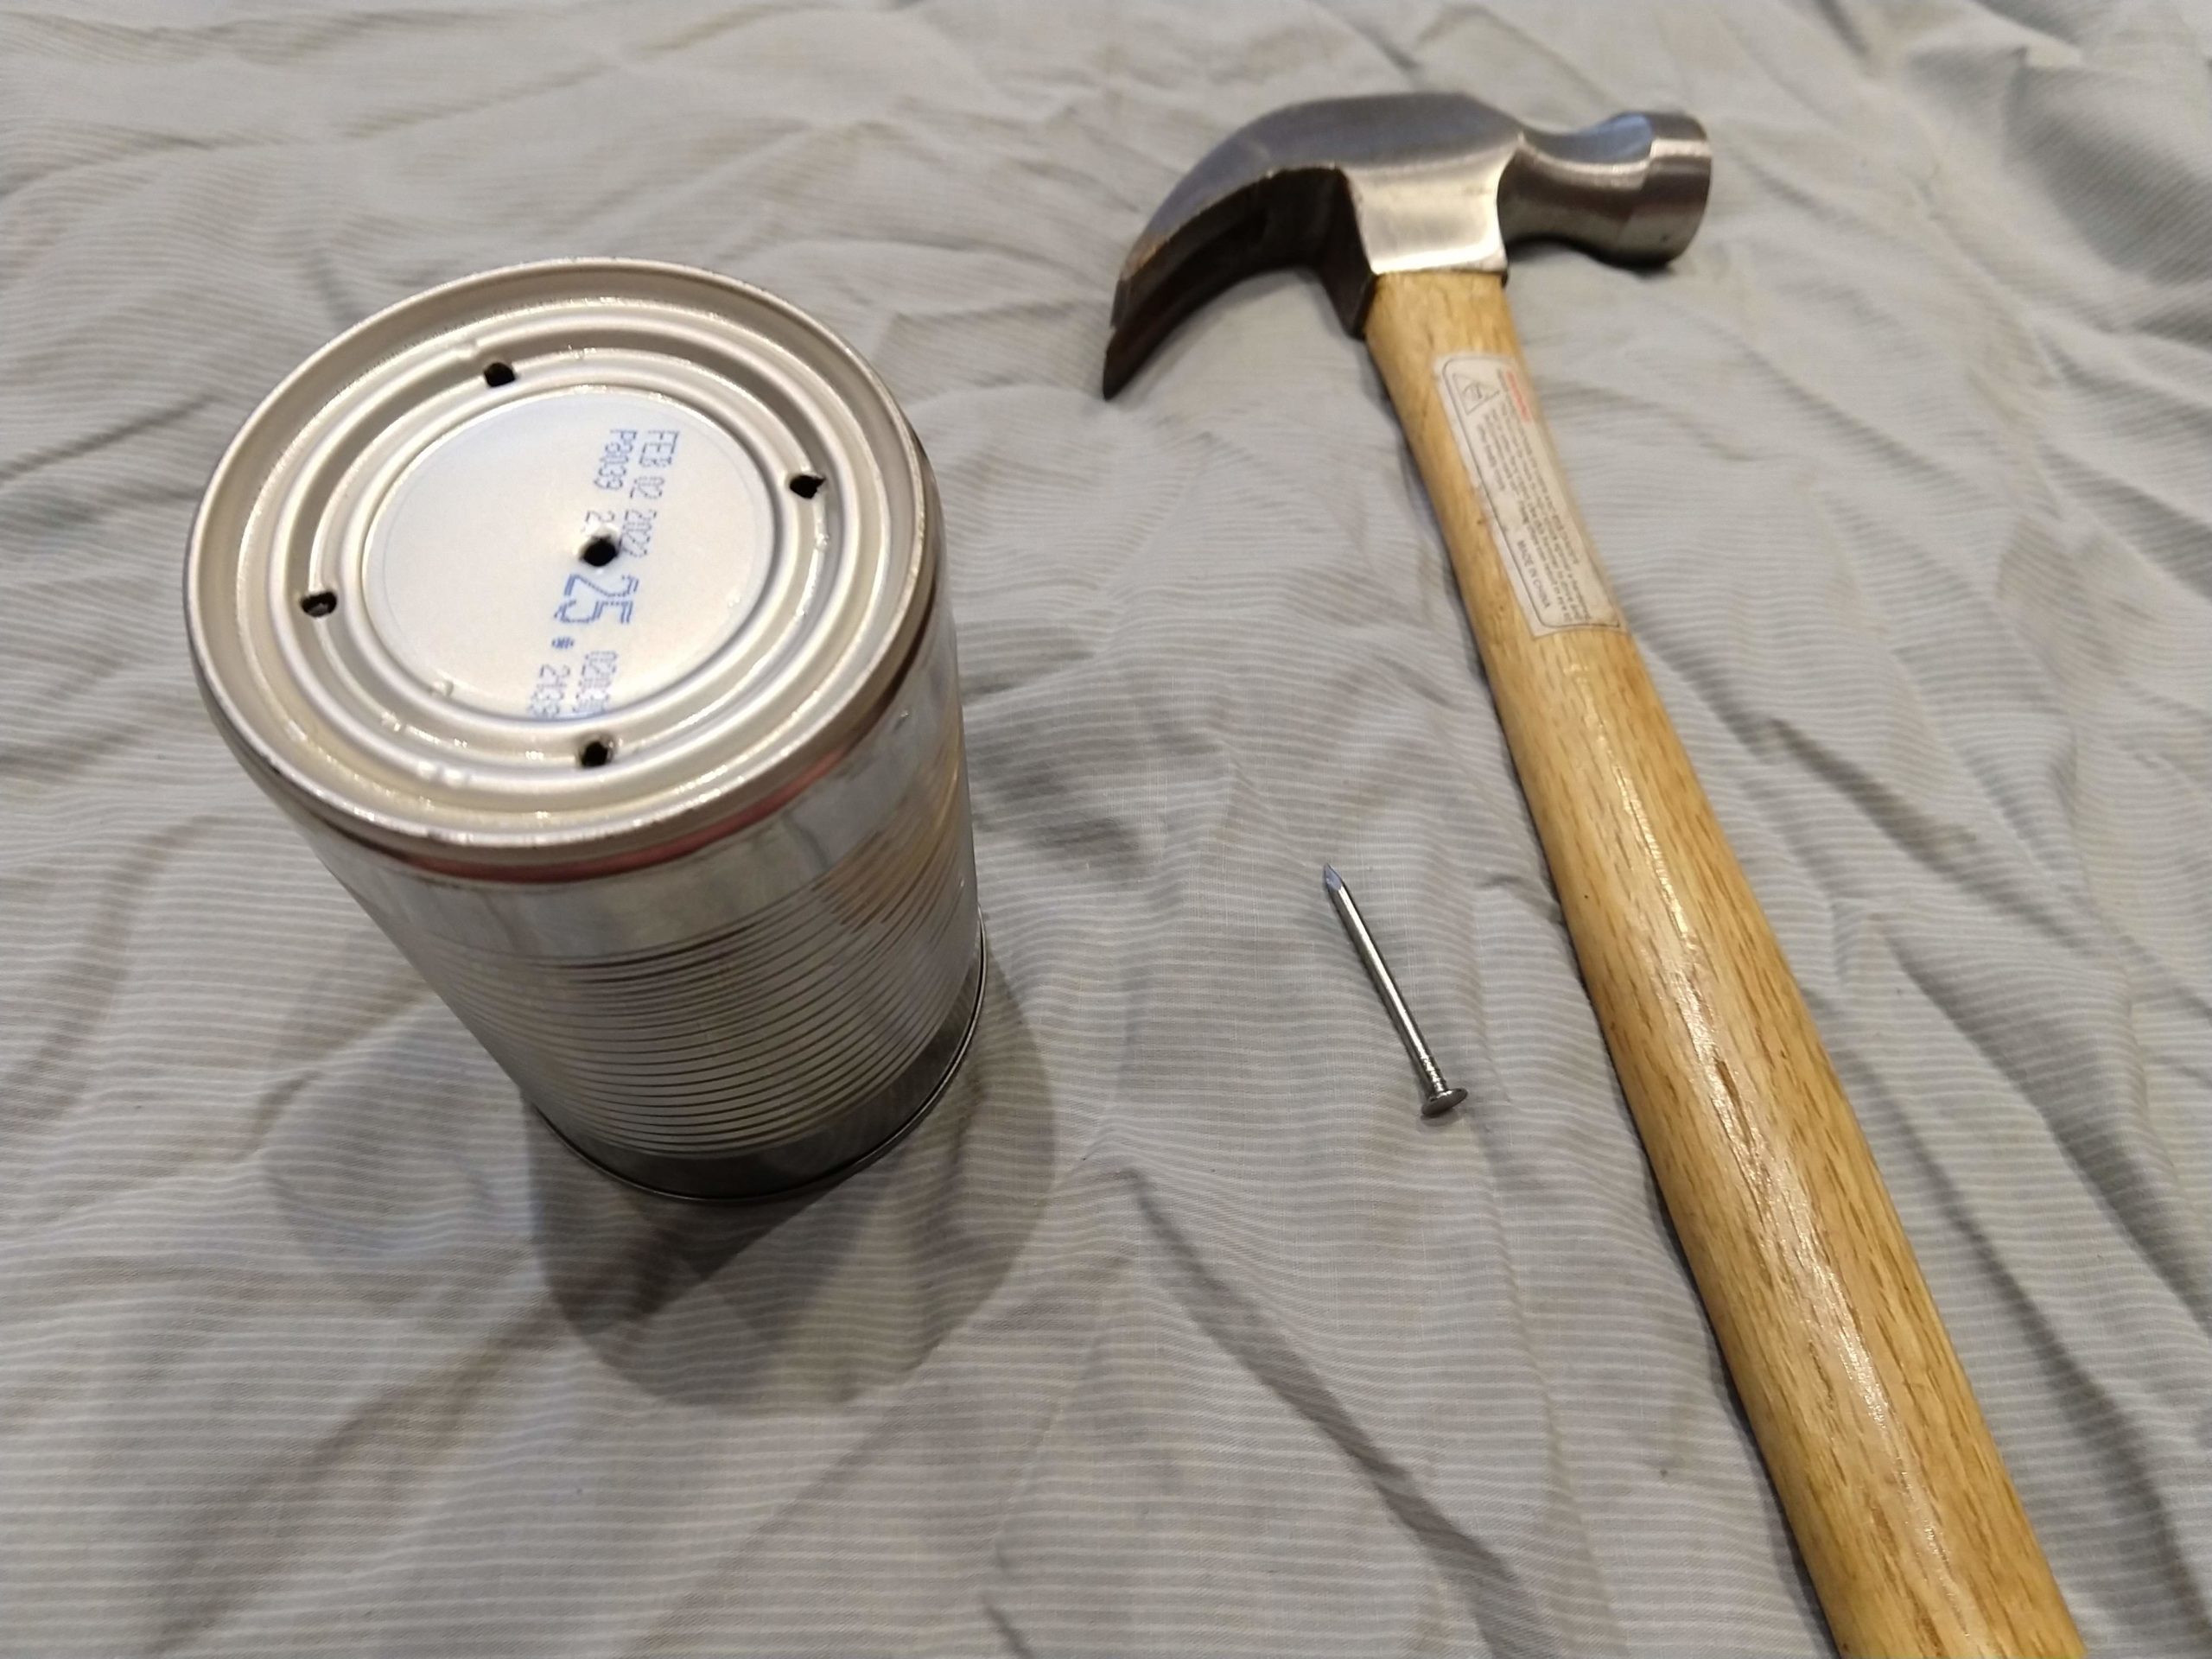
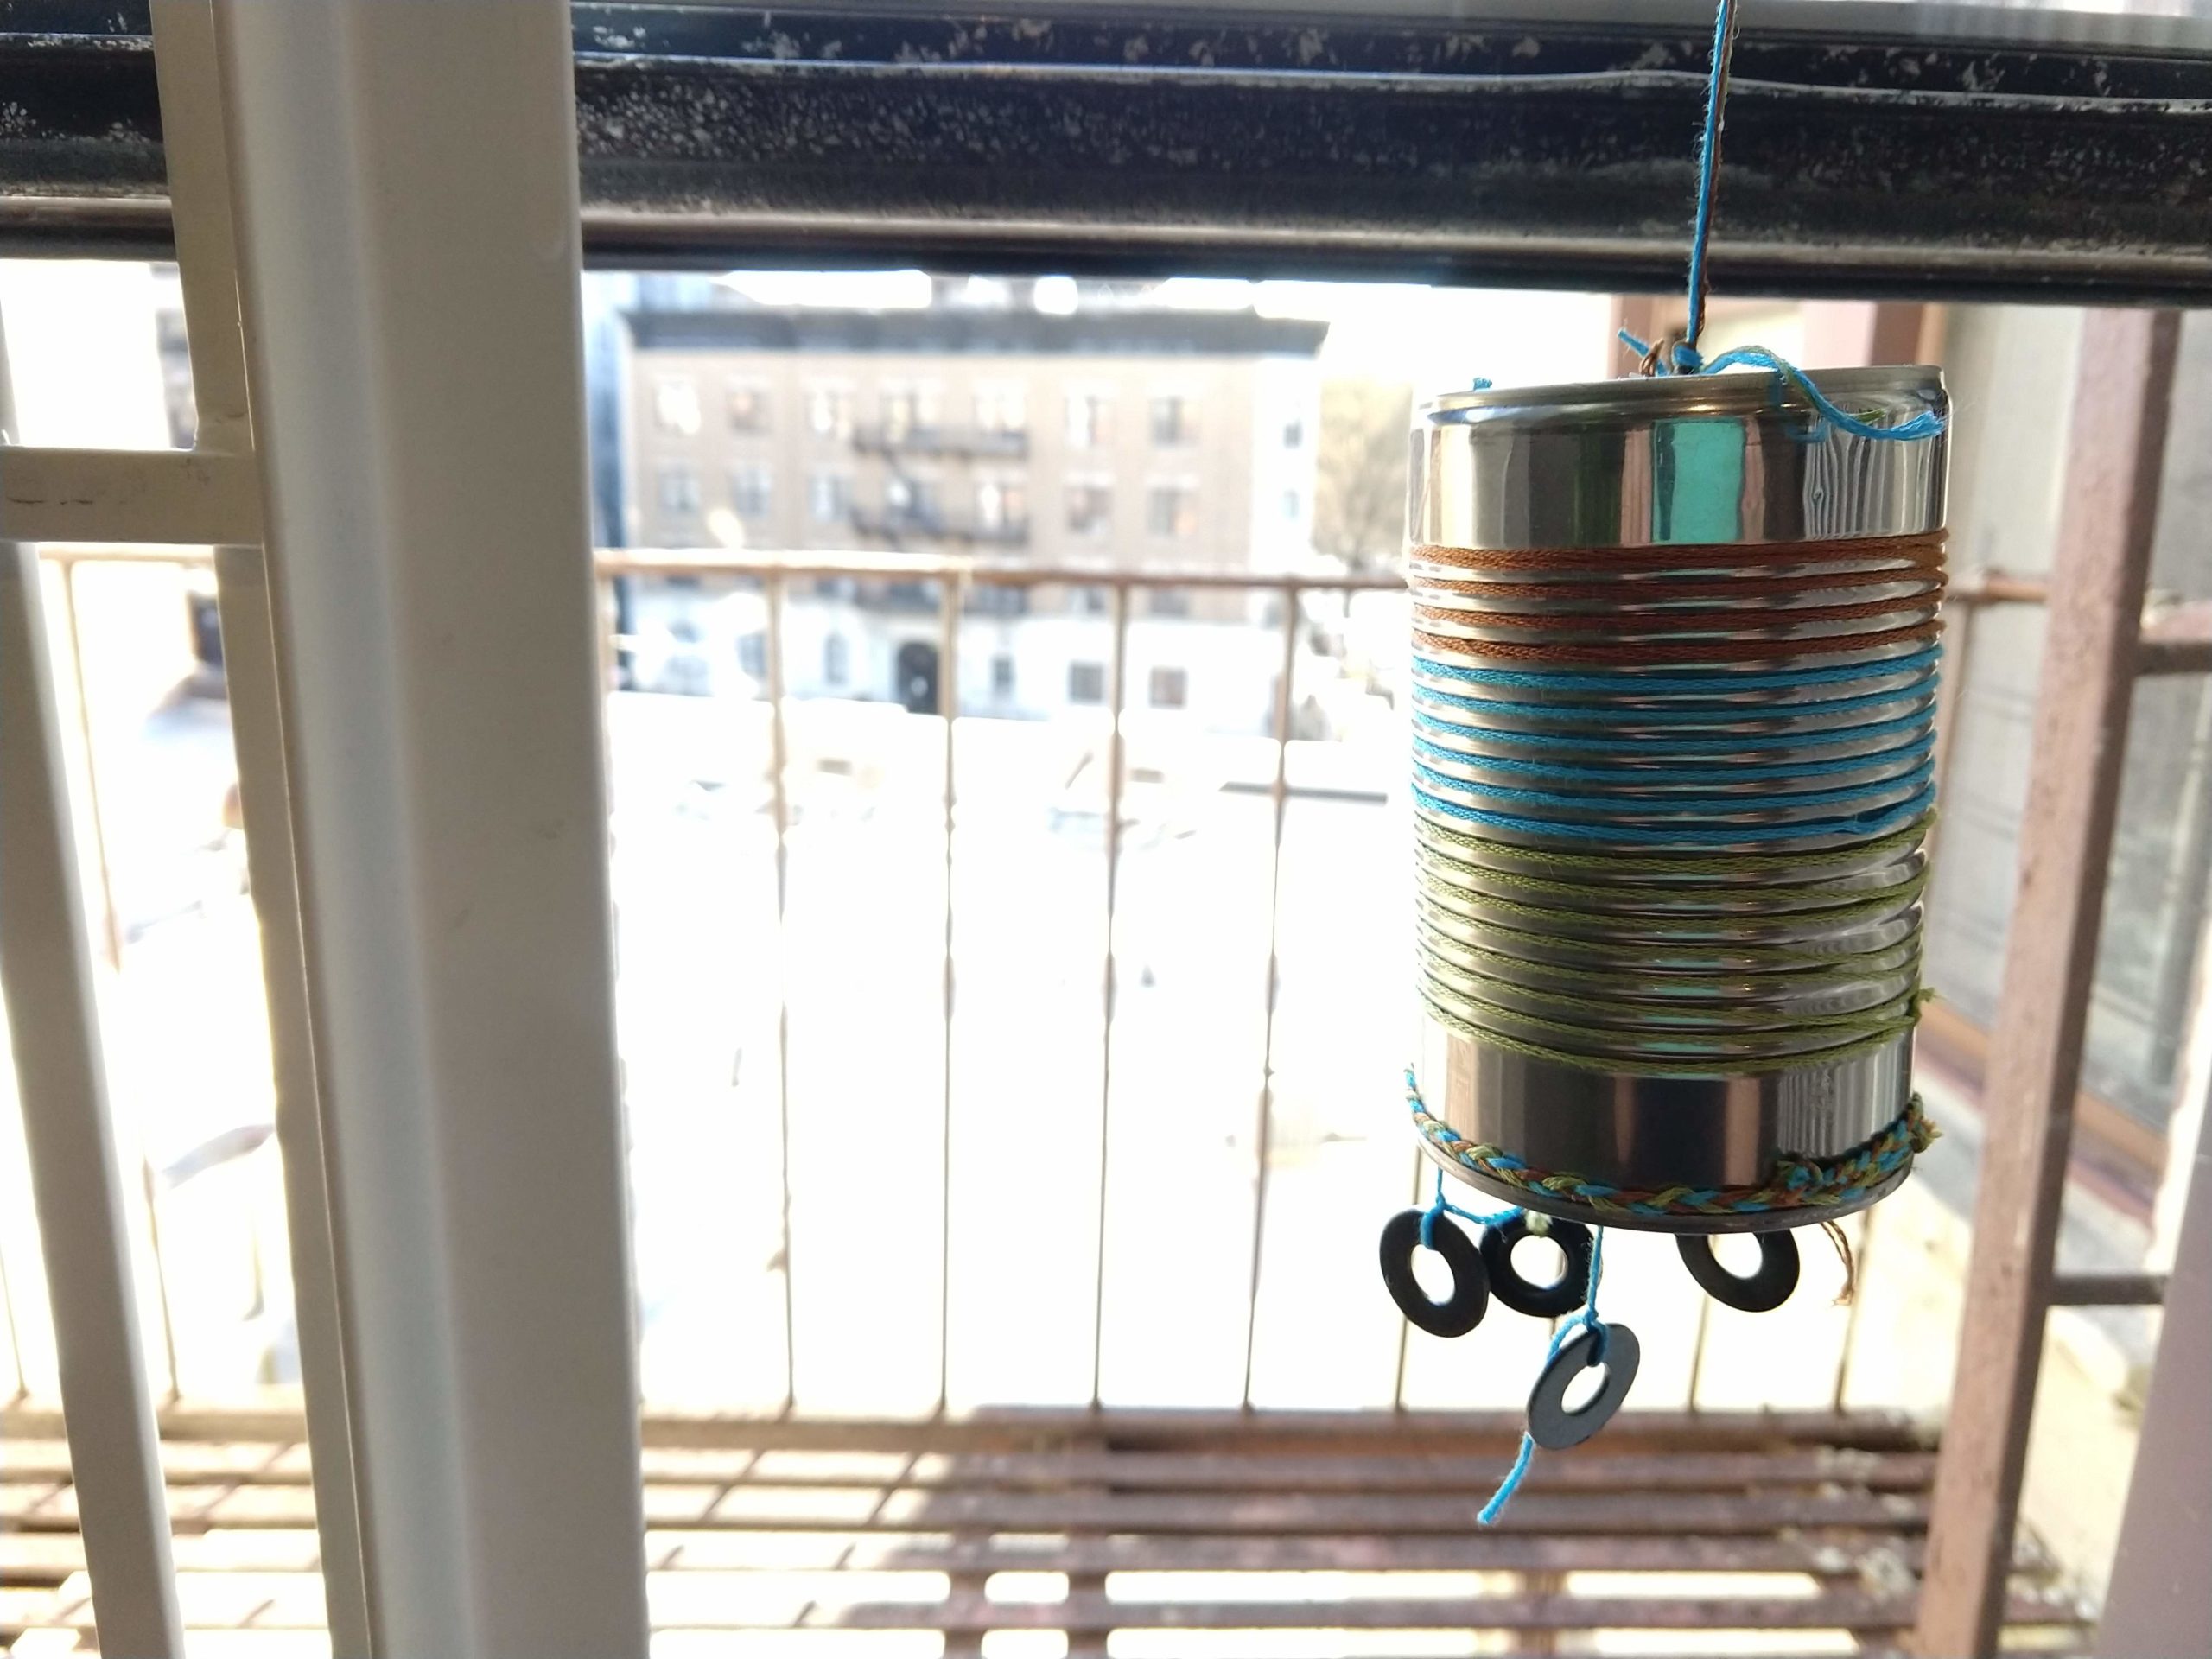
- Use the hammer and nail to make a hole in the bottom center of the tin can. This hole will hold the string to hang the windchime.
- Use the hammer and nail to make several holes around the circumference of the can. Make as many or as few holes as you like.
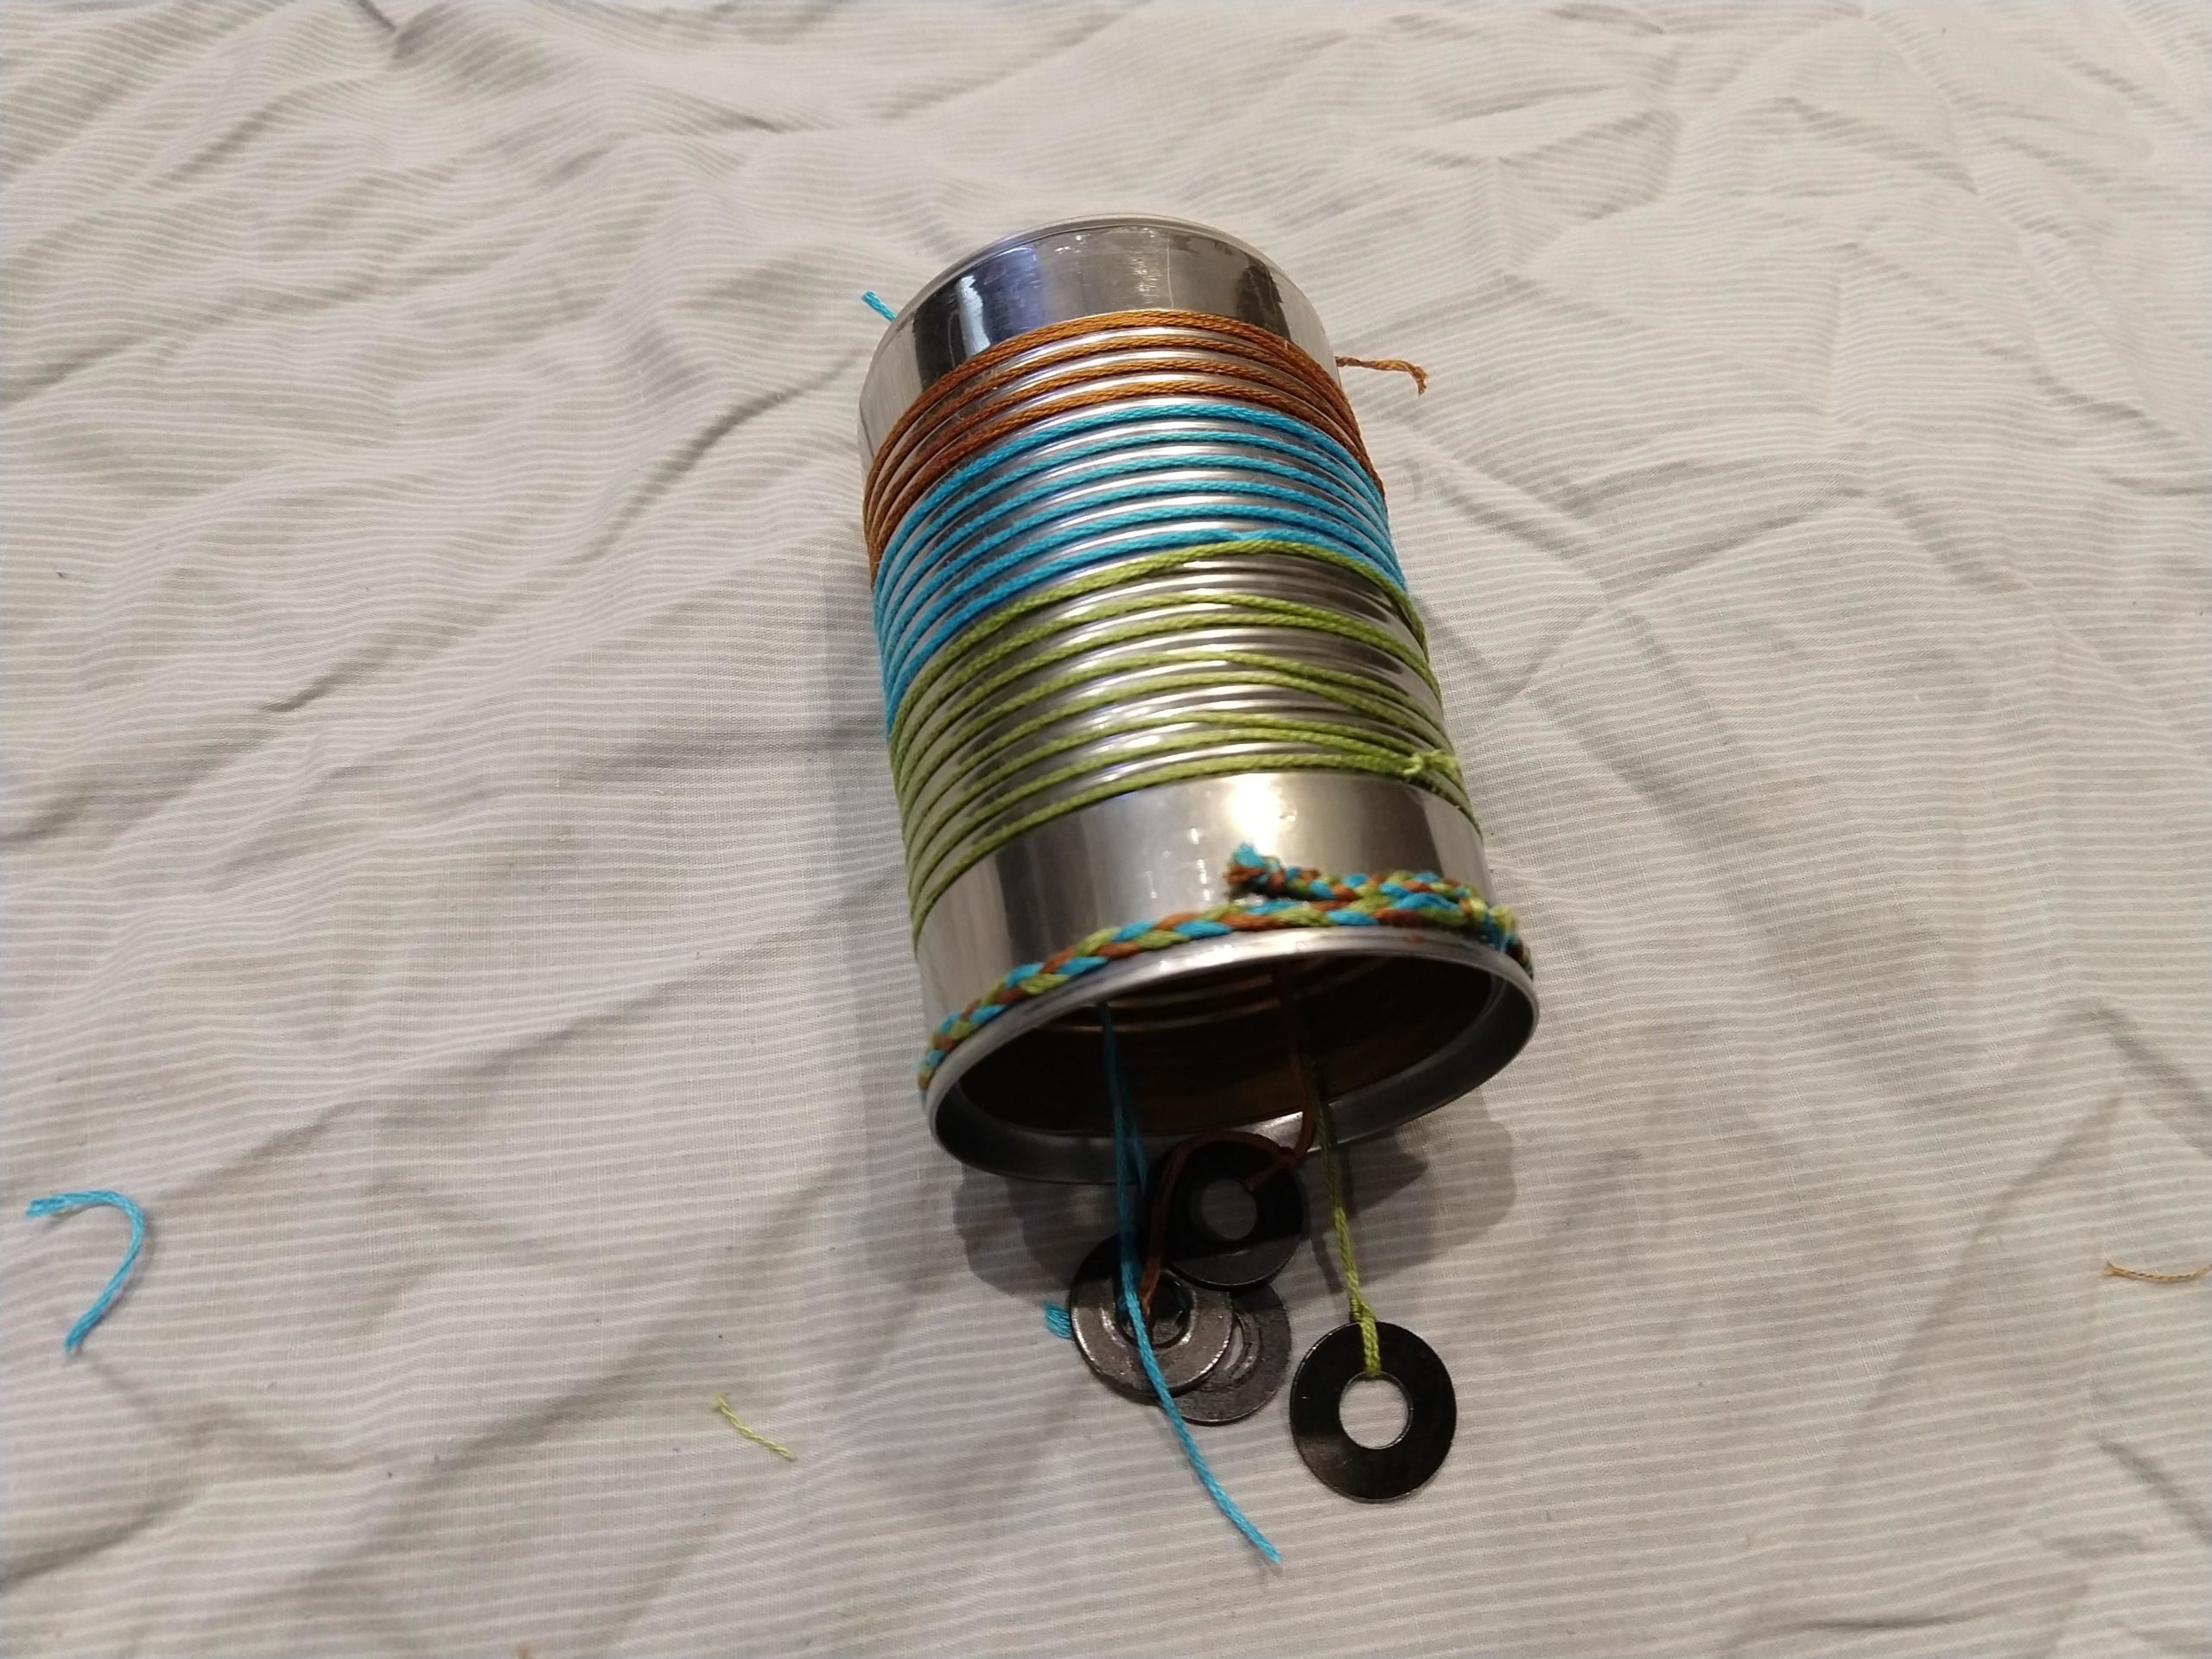
- Decorate the can. This can was decorated by wrapping and gluing different colors of embroidery floss. Be creative using the materials you have!

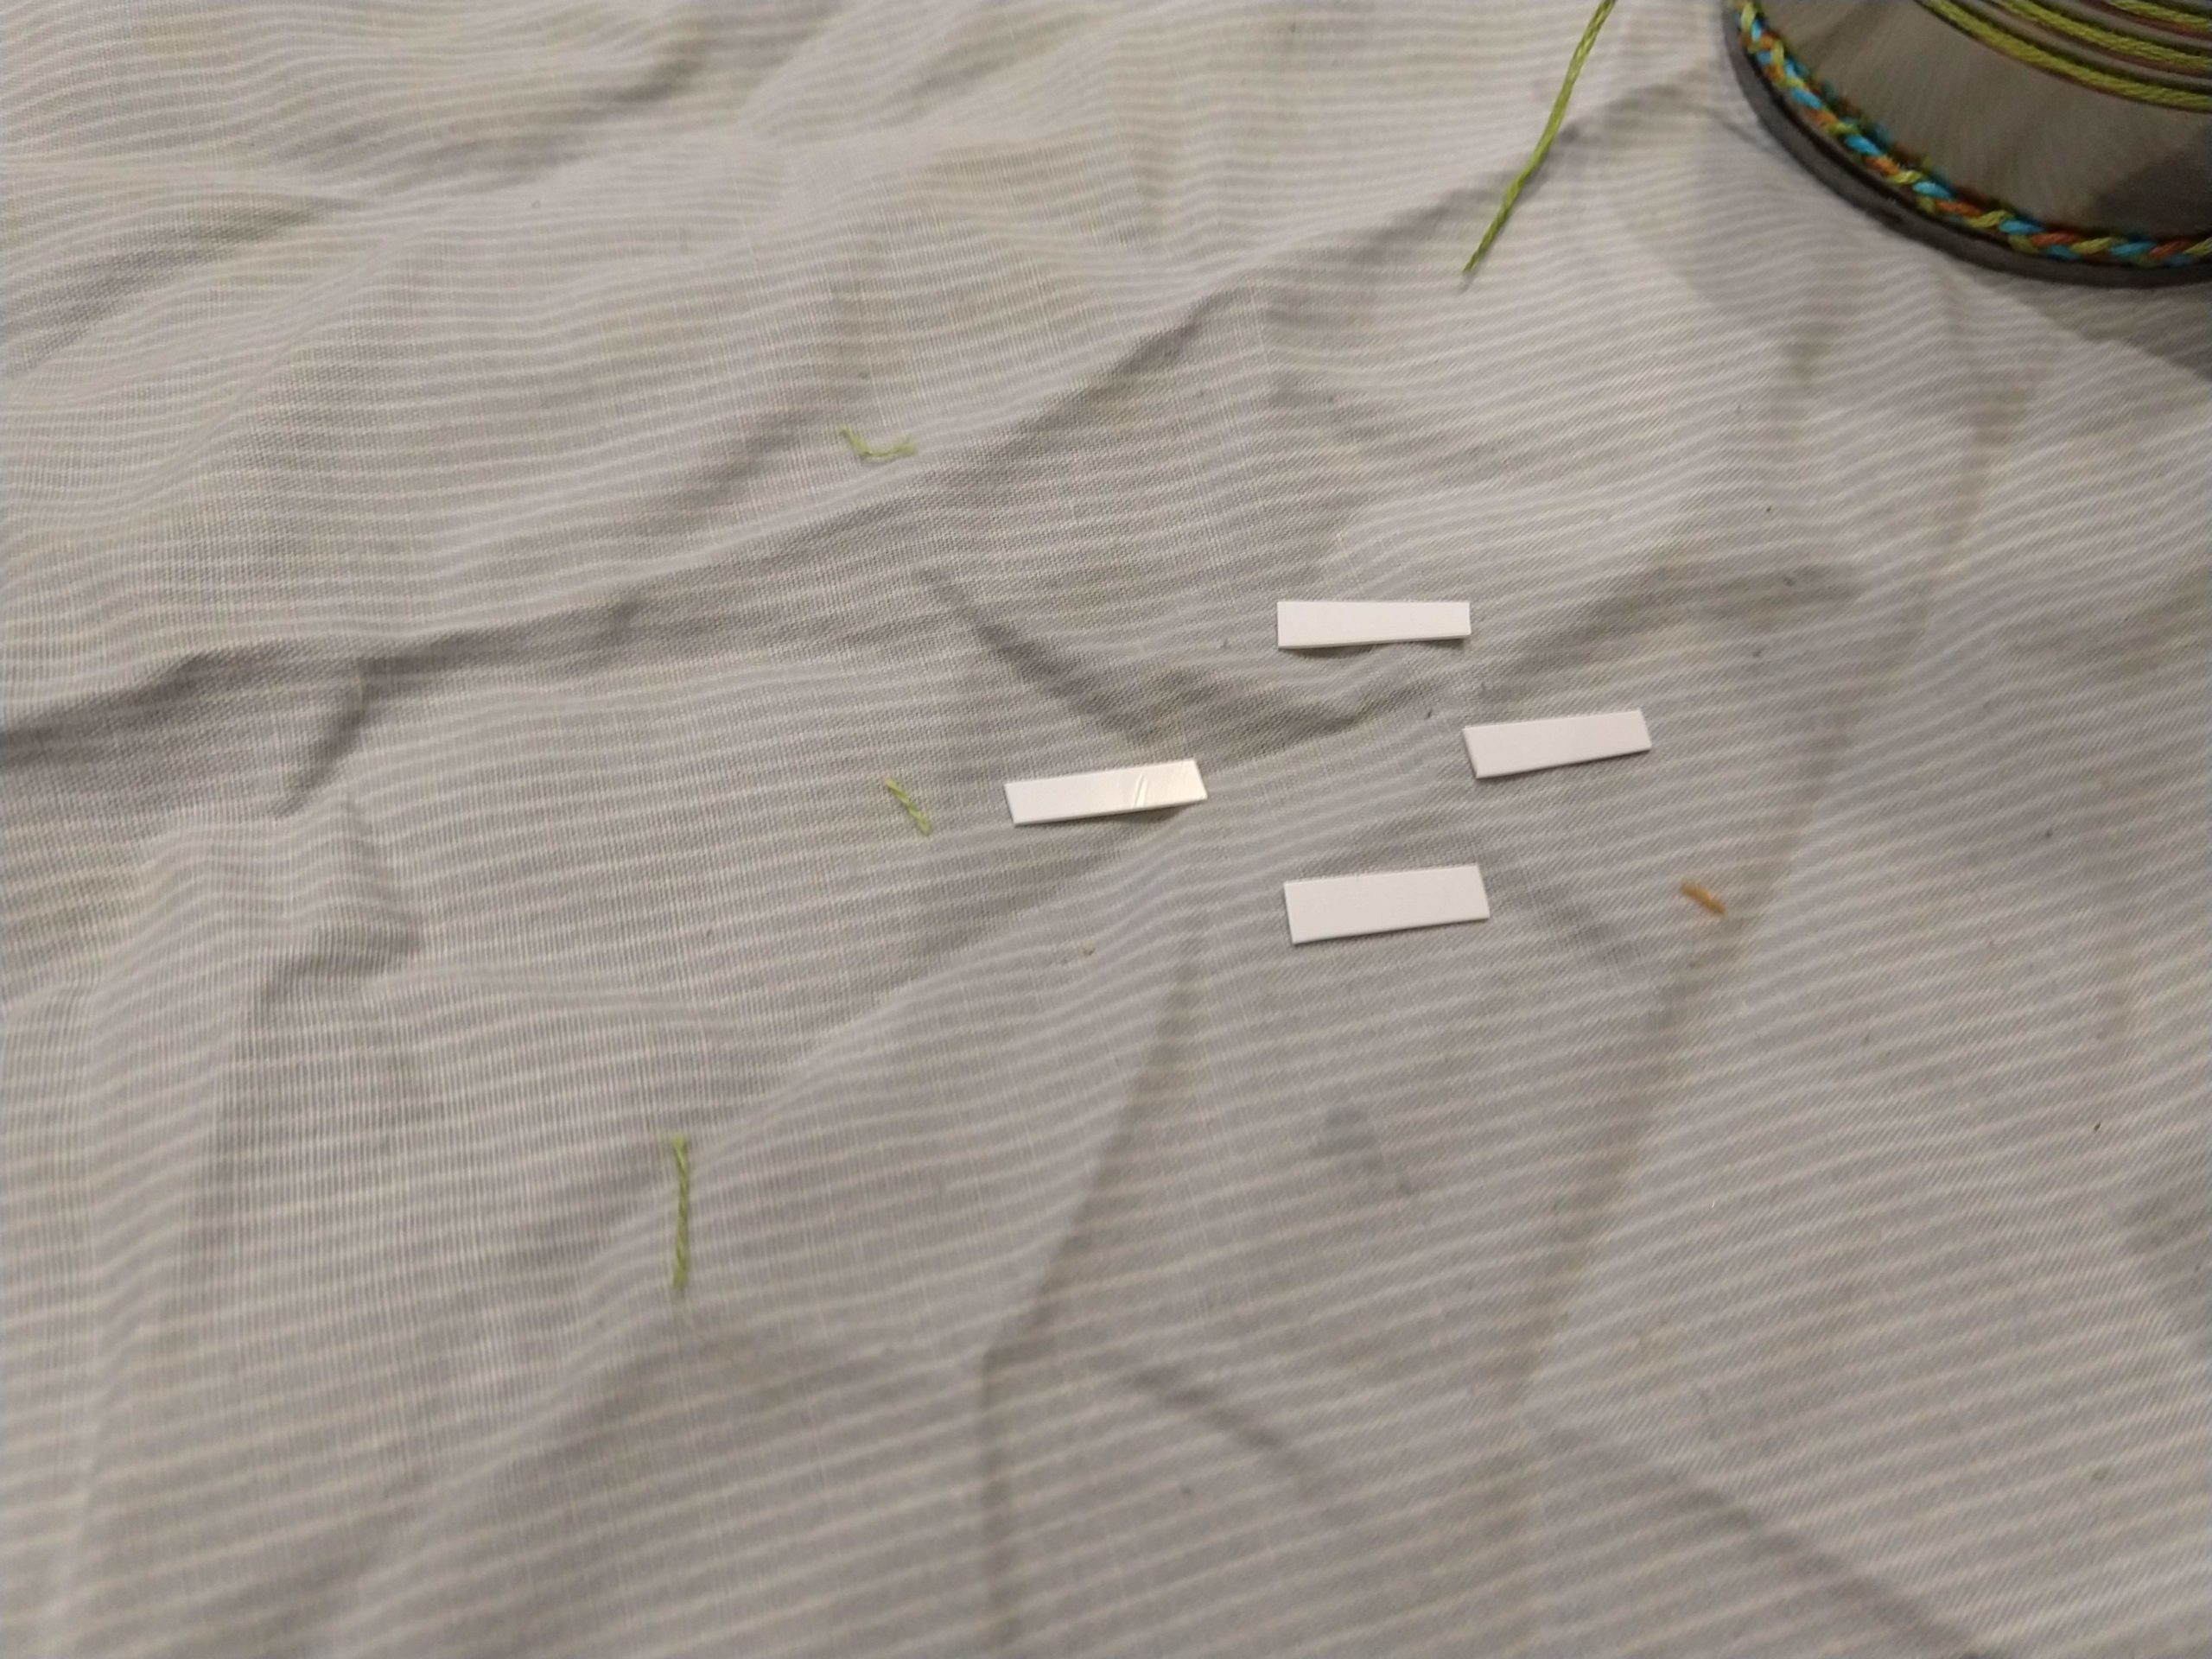
- Cut out small strips of firm plastic, one for each of the holes in the tin can. The strips should be slightly bigger than the holes.
- Take a piece of string slightly longer than the tin can. Thread one end of the string through one of the holes on the side. Wrap the end of the string around the plastic strip and secure with glue or tape to prevent it from falling through the hole.

- Tie your sound-making objects to the other end of the string. You can tie one object to the end, or use multiple objects per string. Repeat with the rest of the holes, except the central hole.
- Thread a long piece of string through the central hole. Pull until you can easily use the string on the open side, while making sure that the “tail” is still through the hole.
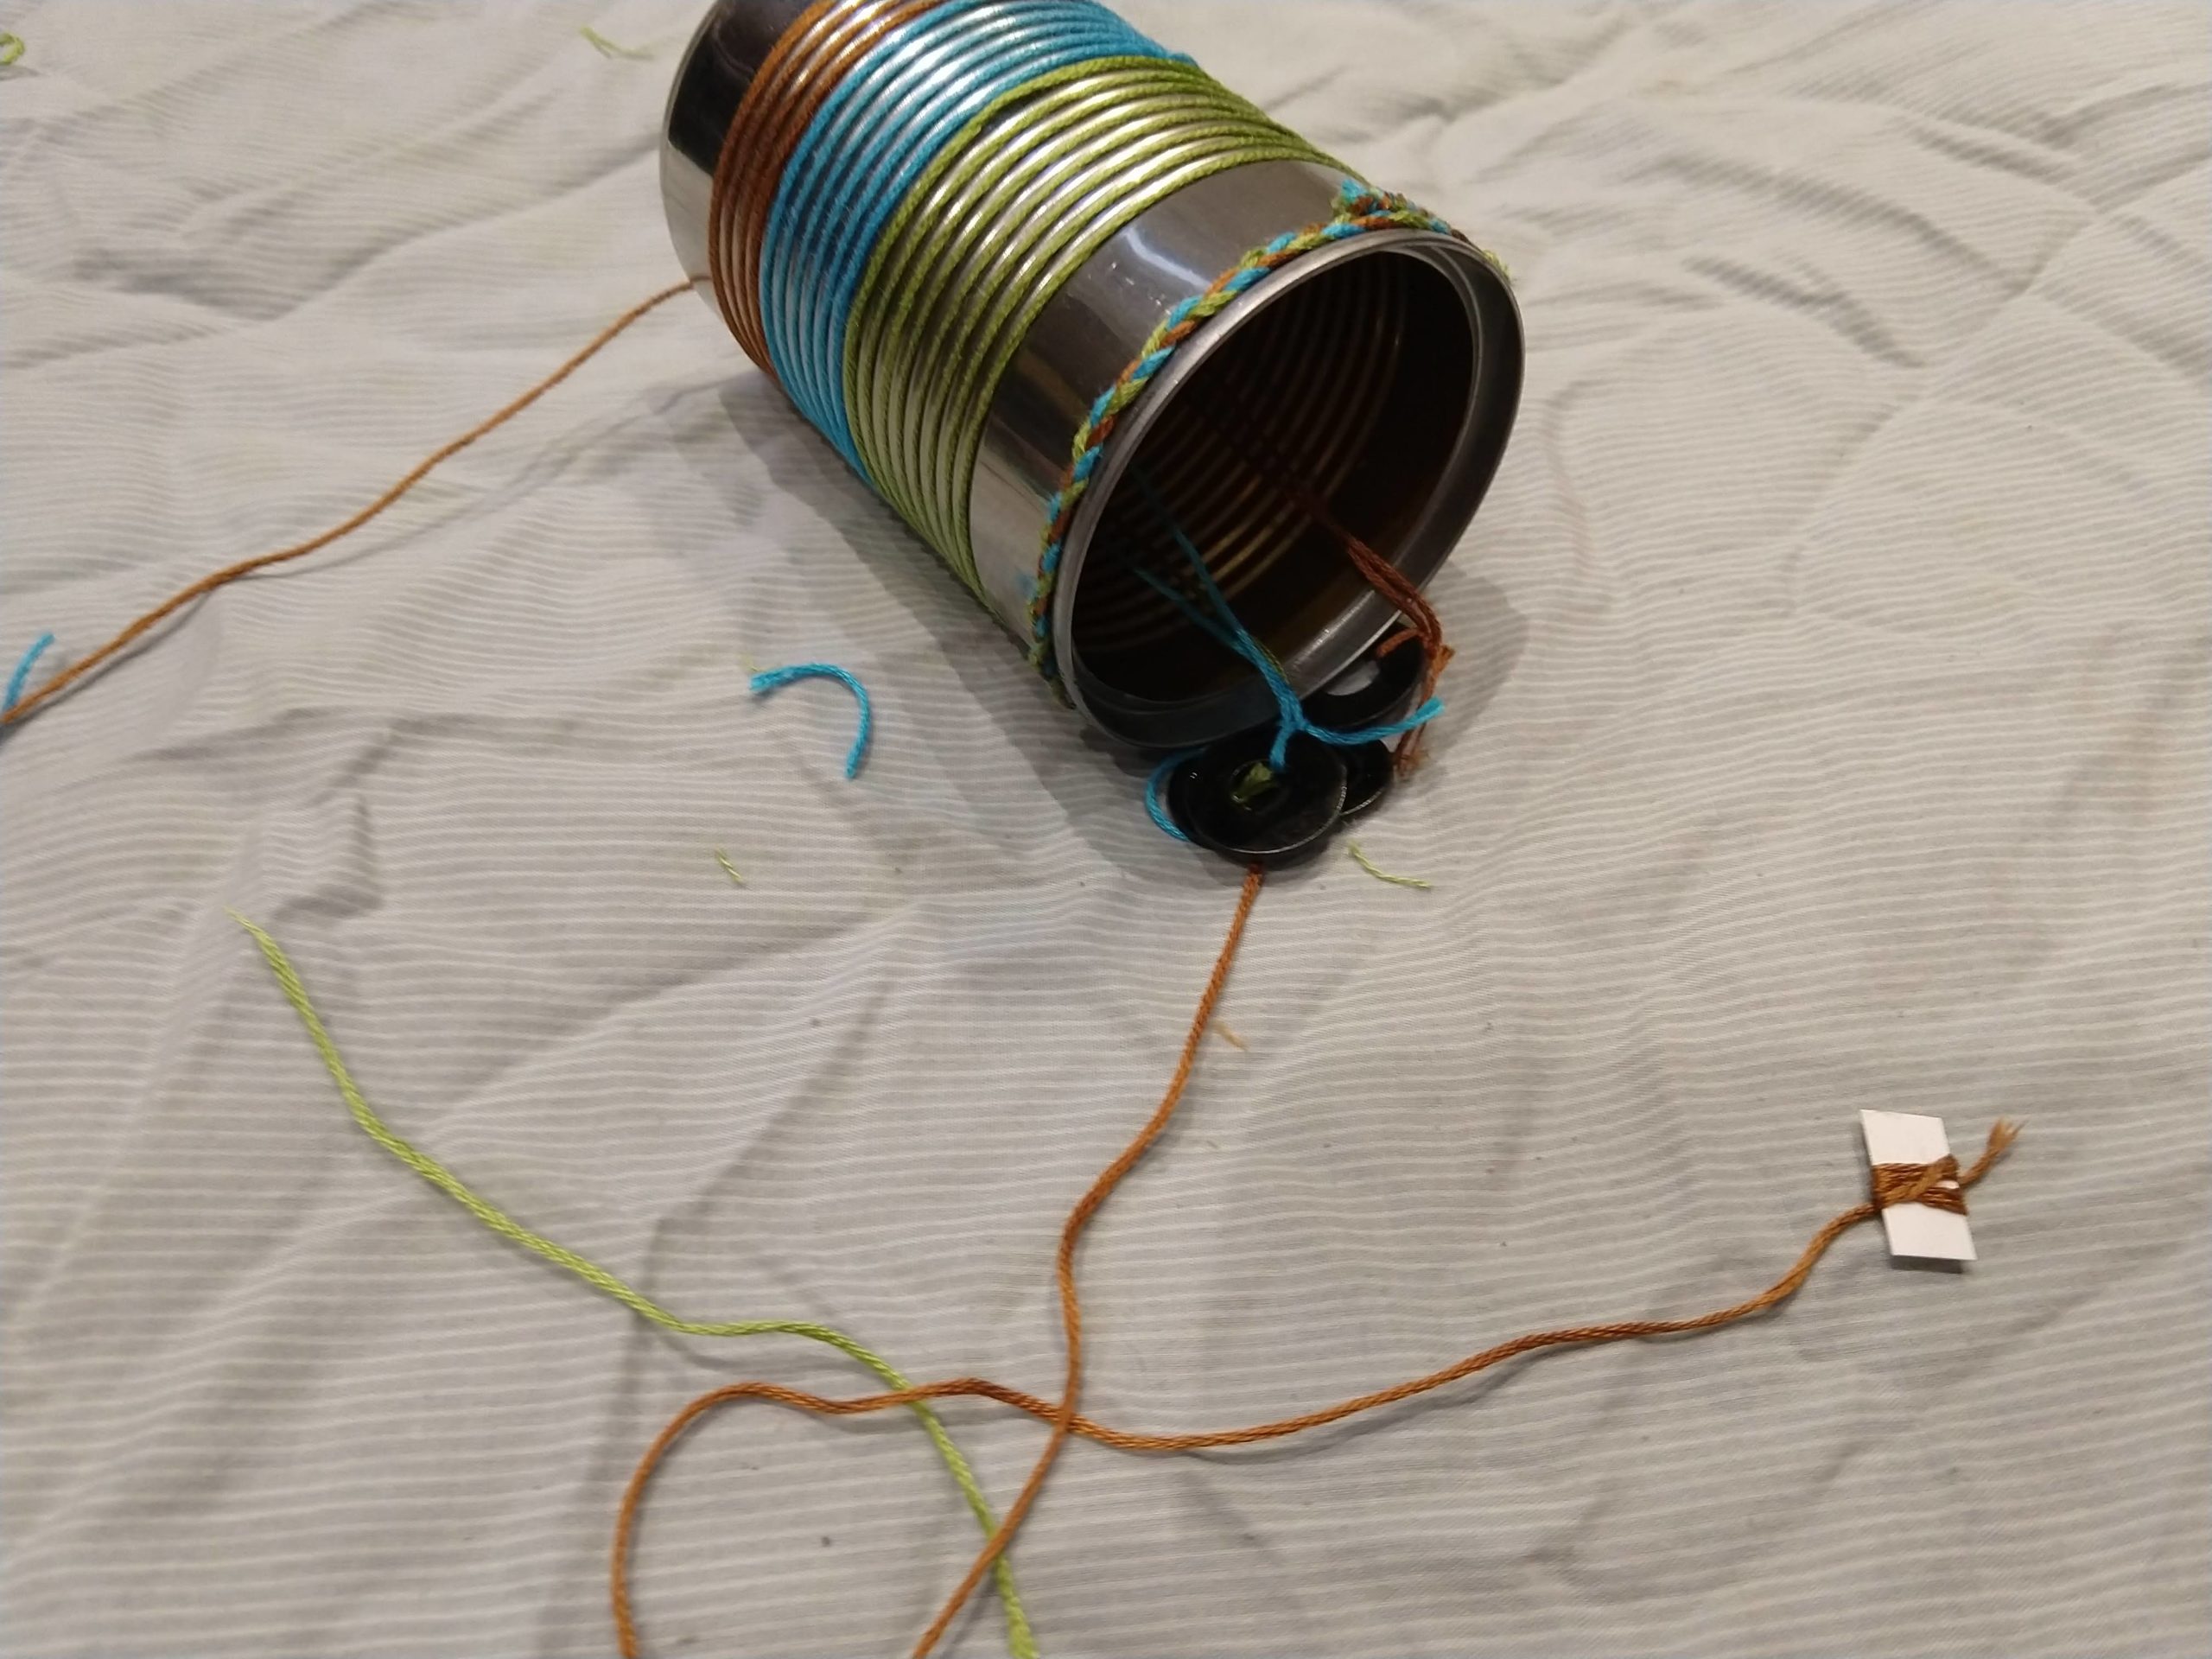
- Tie the string around a piece of plastic and secure with glue or tape.
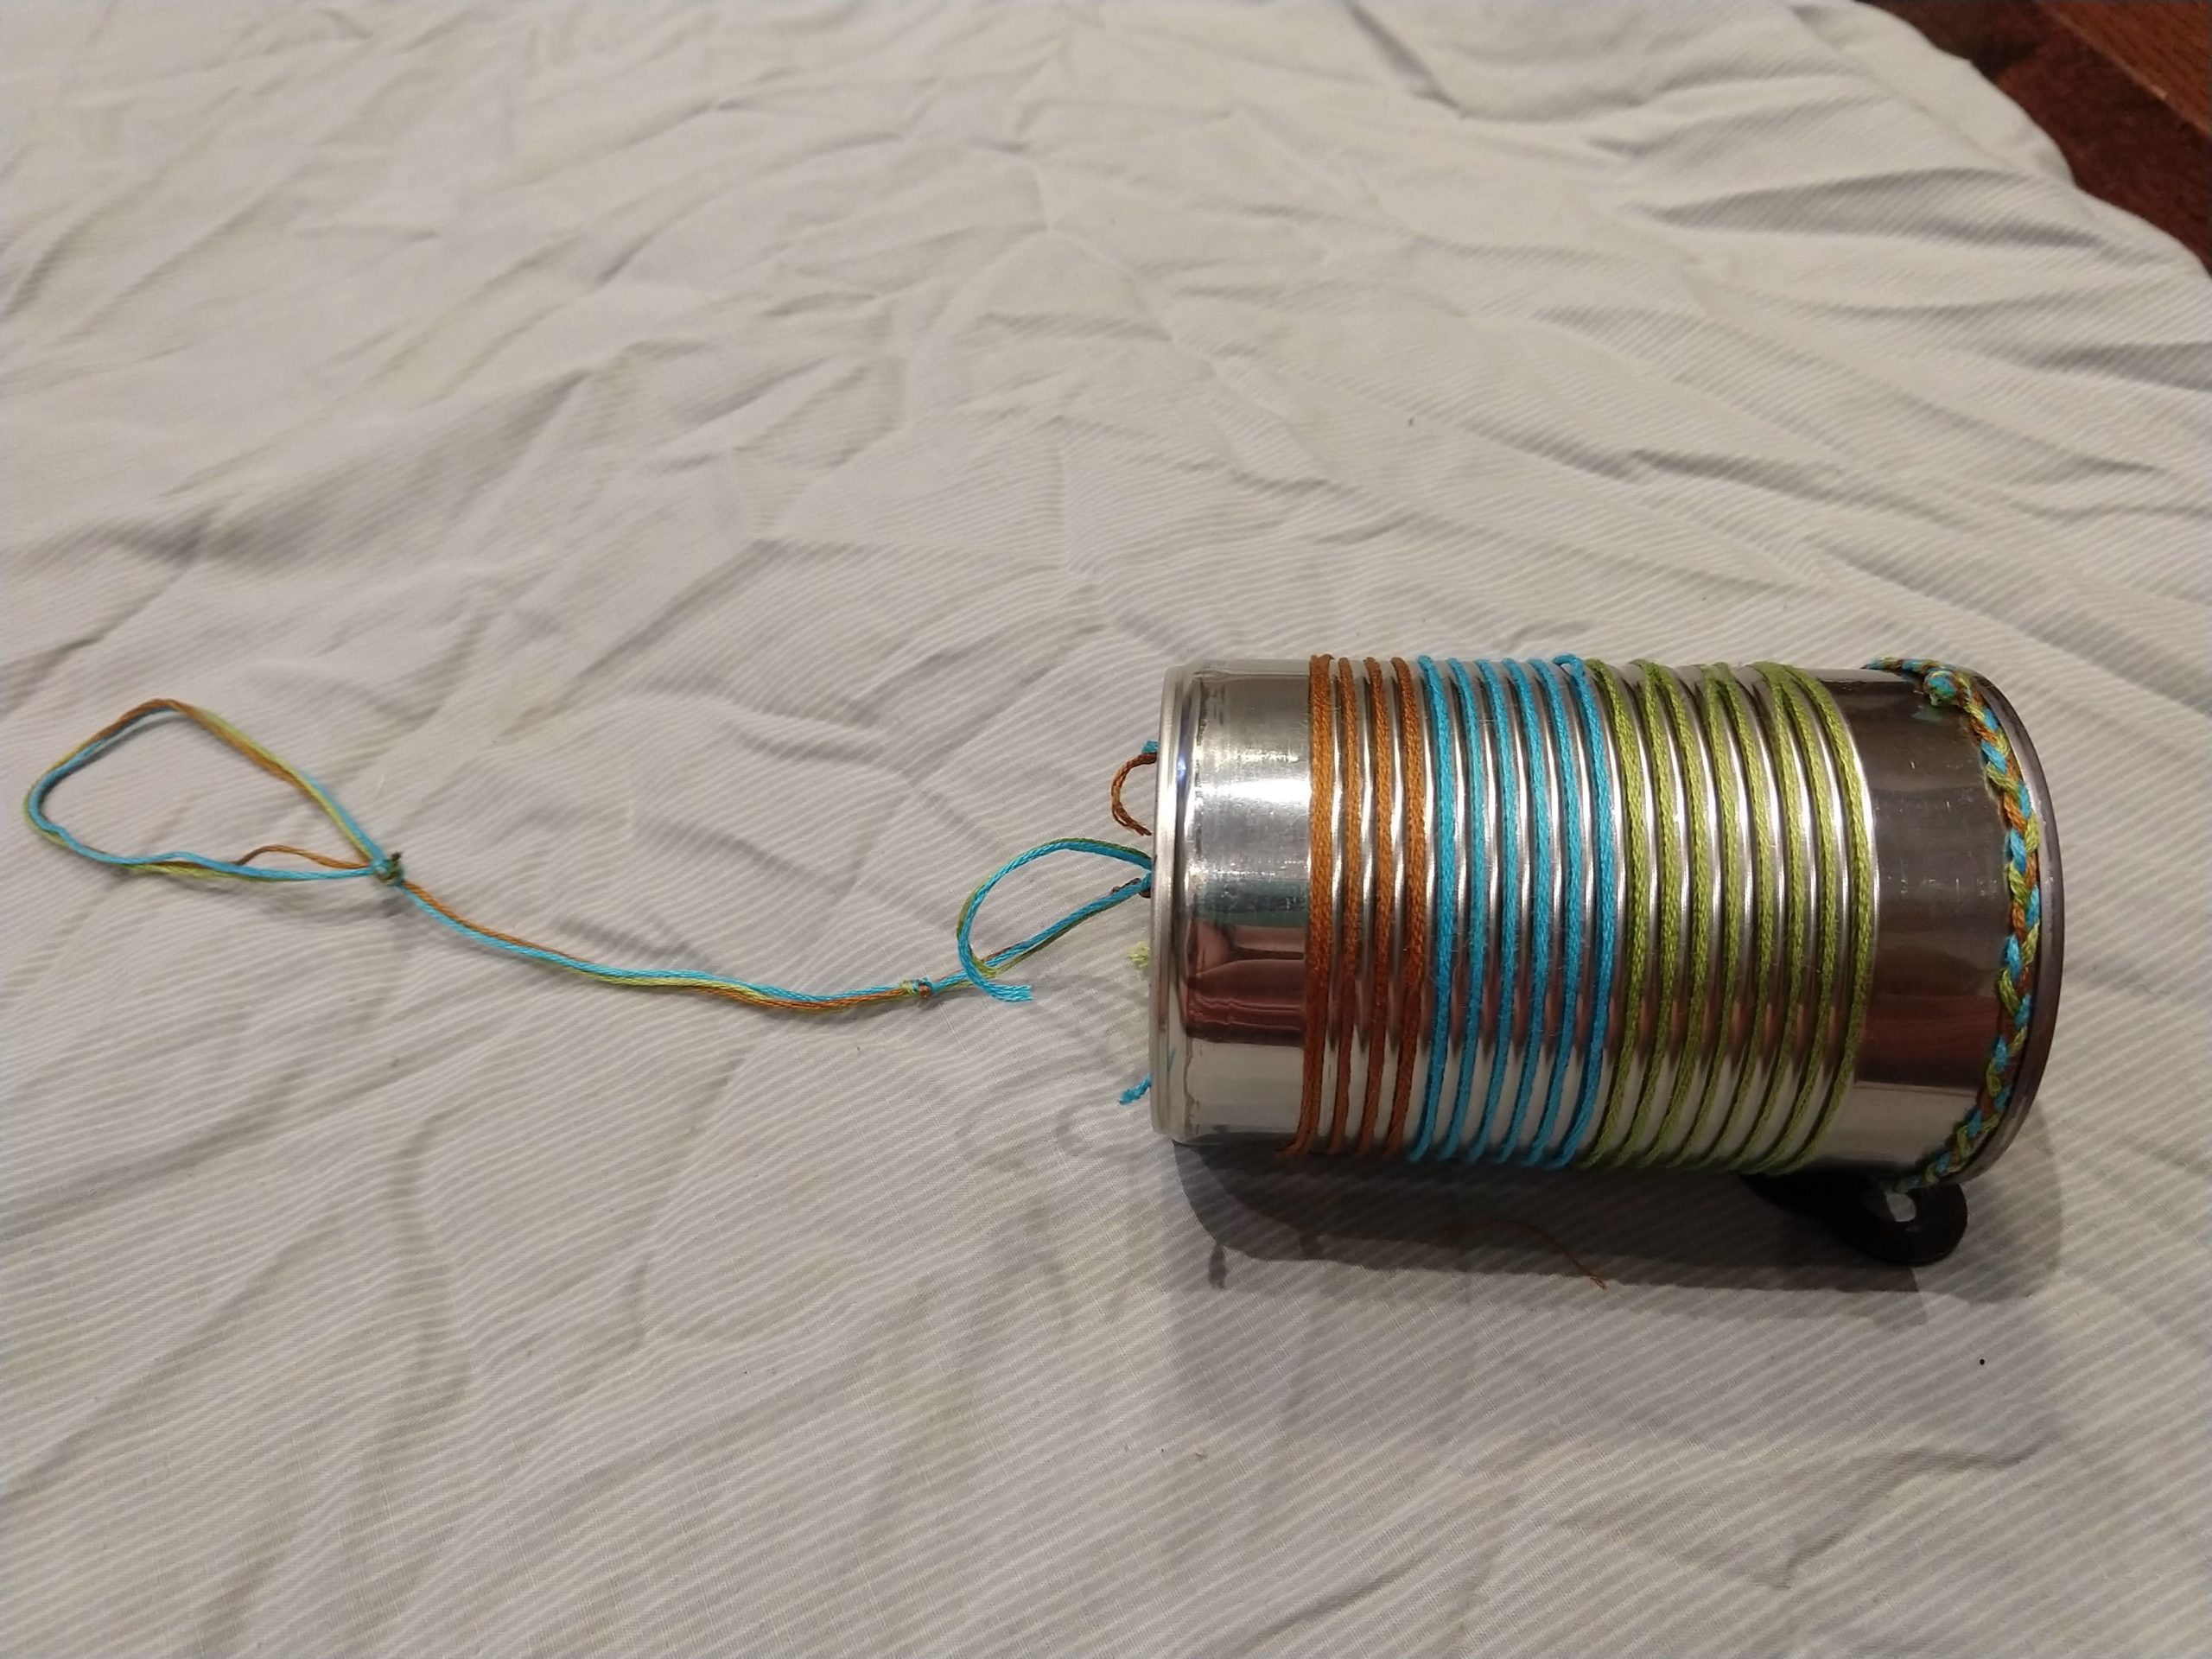
- Pull the tail of the string back through the hole on the top, and tie it to make a big loop. The plastic should keep the string in place.
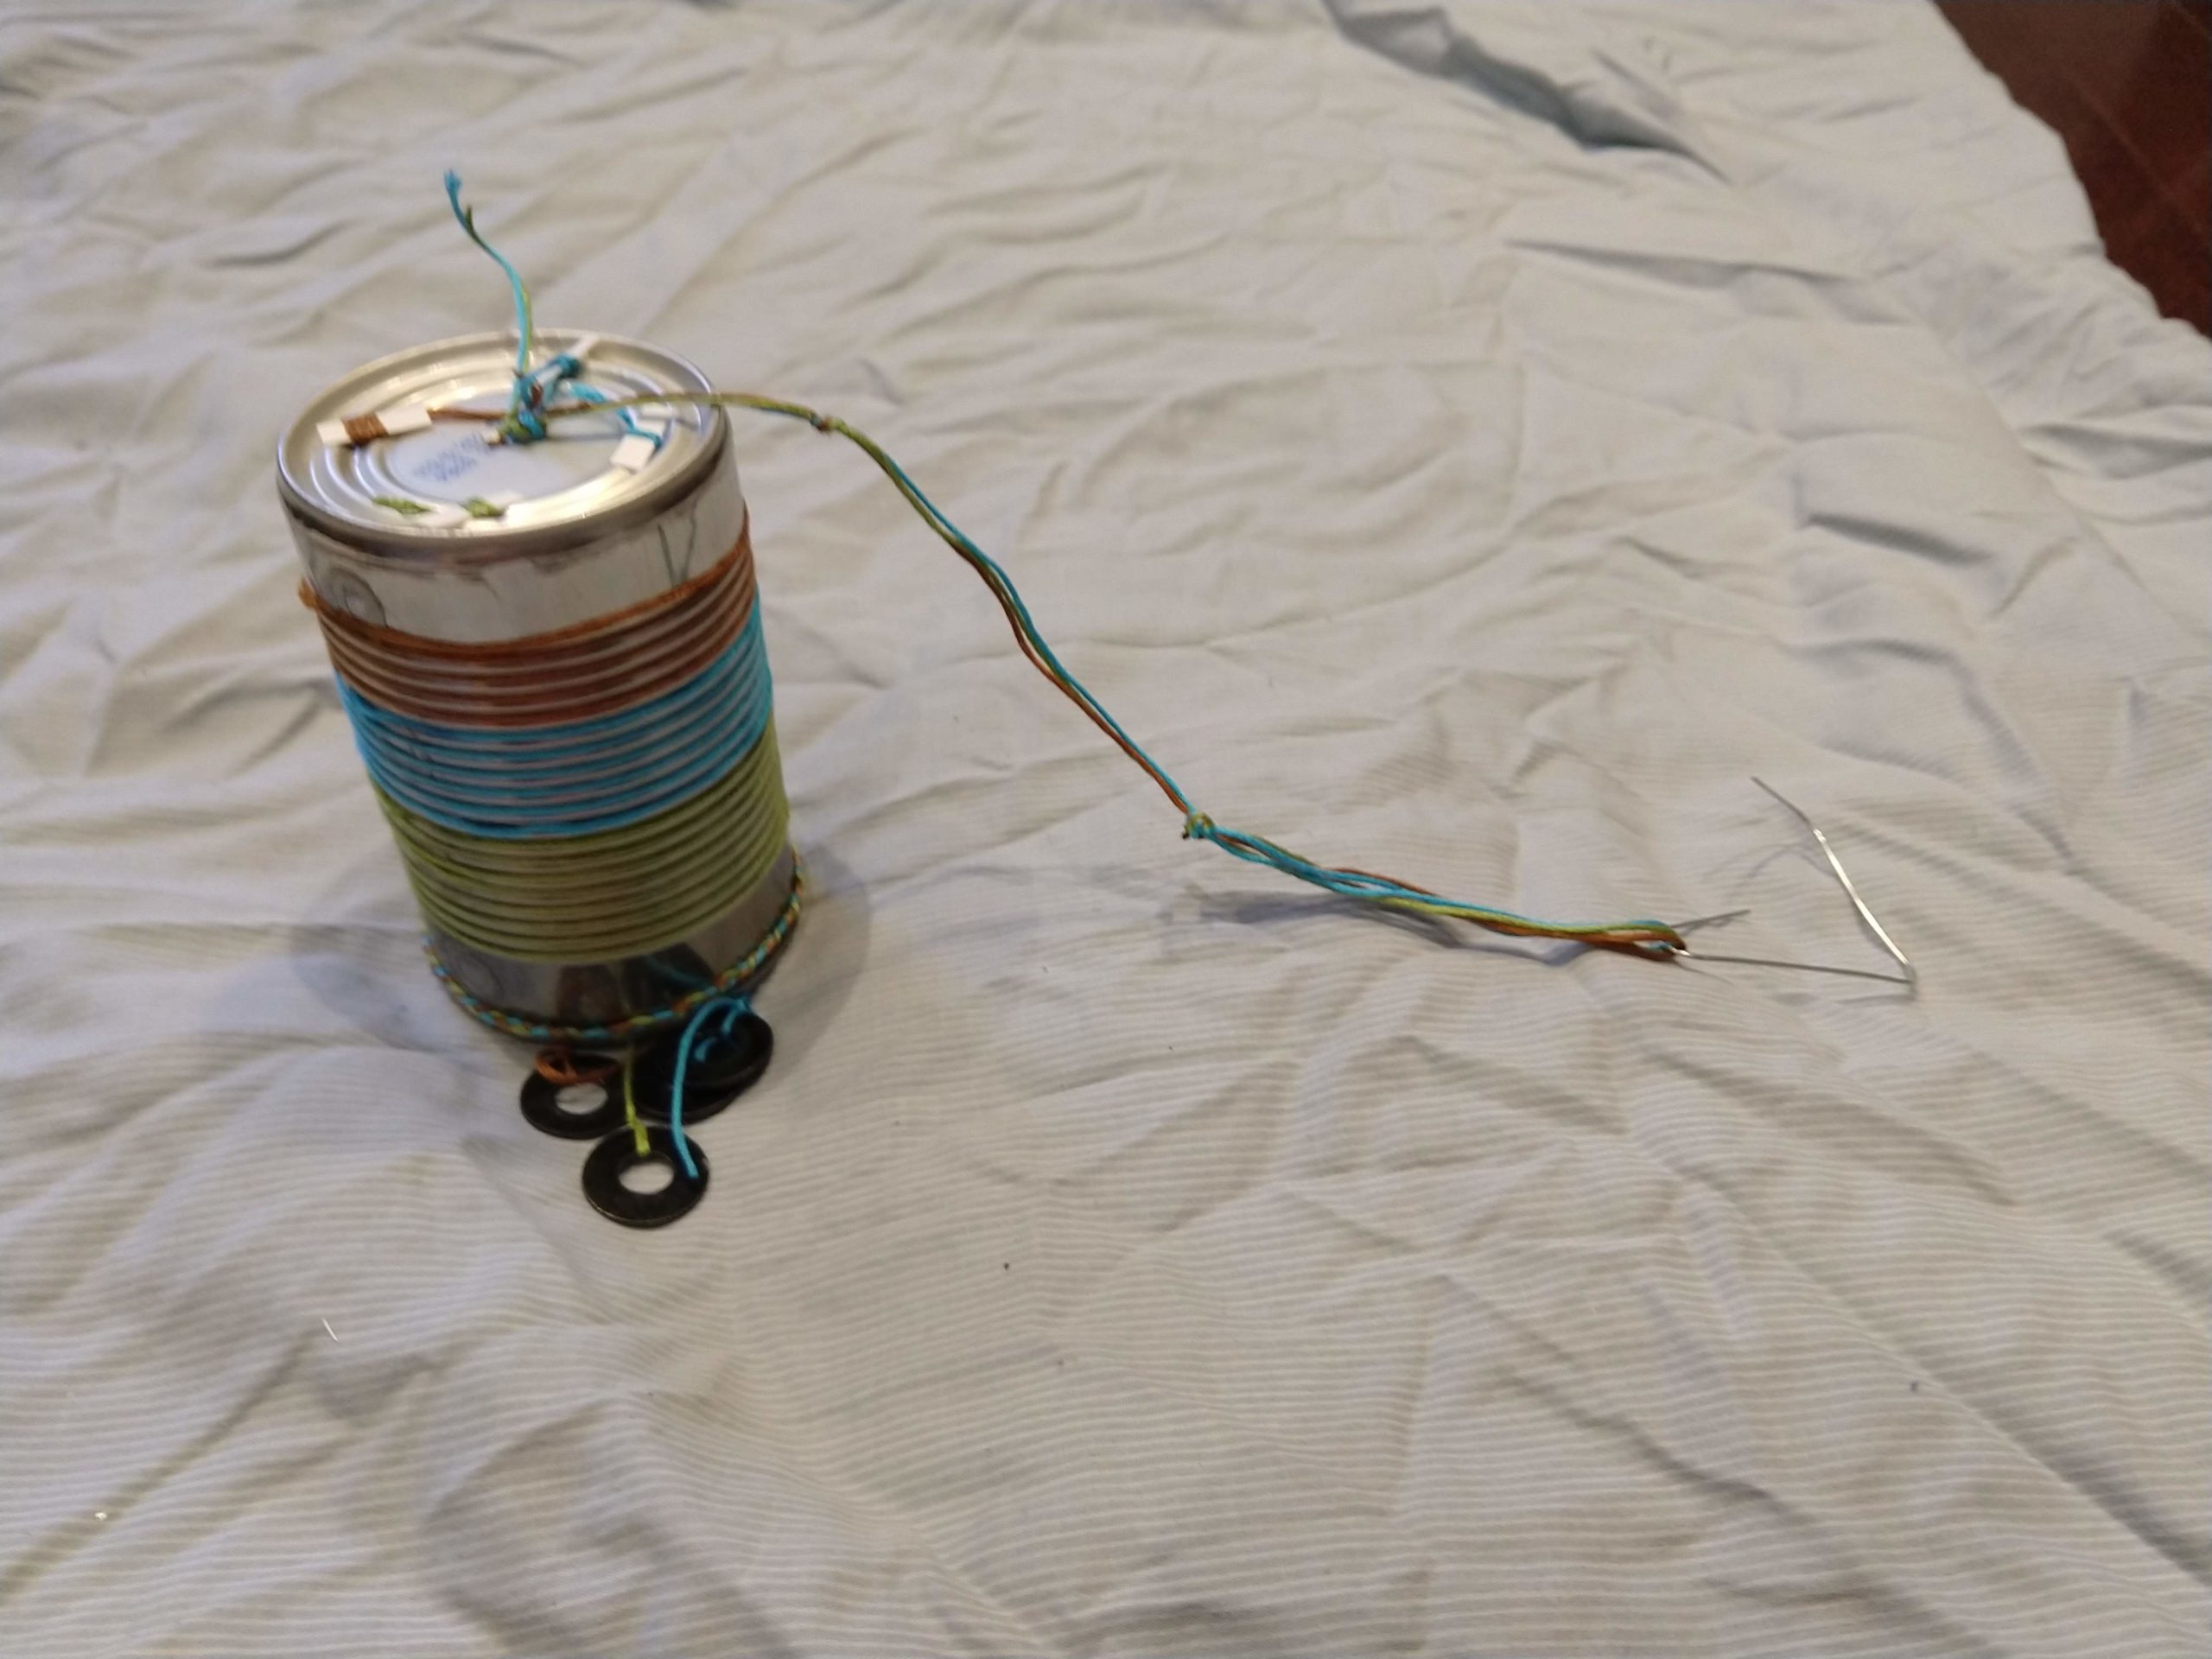
- Open a paper clip, and use it to hang your wind chime from a windowsill, fire escape, or porch.
Upcycle your Stream with STEAM!

Upcycling is a great way to decorate your home at home. Share your thoughts, reactions or questions about upcycling. Share your windchime! Post on social media #FreshkillsUpstream #WasteFreeWednesday